
Abdin's build: Dragon Grille 138/1 H FINISHED 10/31/2009
+11
lupanzer
brokeneagle
holmerz
Richard Marchand
noir
Noel-Petroni
Kreighshoer
RickLawler
Jenny Ryan
Panzer
fledermaus
15 posters
Page 2 of 2
Page 2 of 2 •  1, 2
1, 2
Re: Abdin's build: Dragon Grille 138/1 H FINISHED 10/31/2009
![]() fledermaus Tue Jul 21, 2009 2:49 am
fledermaus Tue Jul 21, 2009 2:49 am
Hello friends,  well I have resumed my work on the grille H, after soldering and sanding
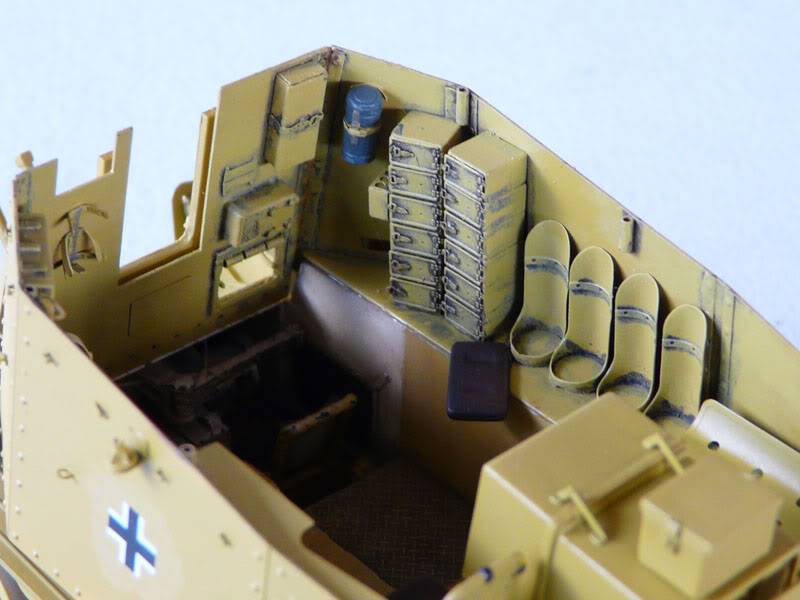
The ends of the ammo holders, I added a styrene disk on the bottom as this are not supplied in the PE kit and I think it needs one.
So I took my trusty home made punch and made all the needed disks

And this is how it looks like completed

Next I continued adding small details to different parts of the vehicle and ammo bins gun base etc…

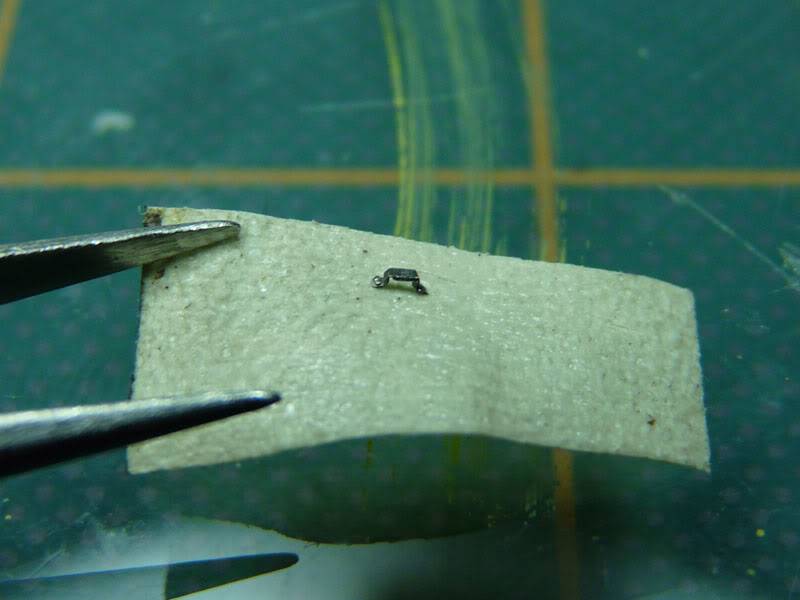
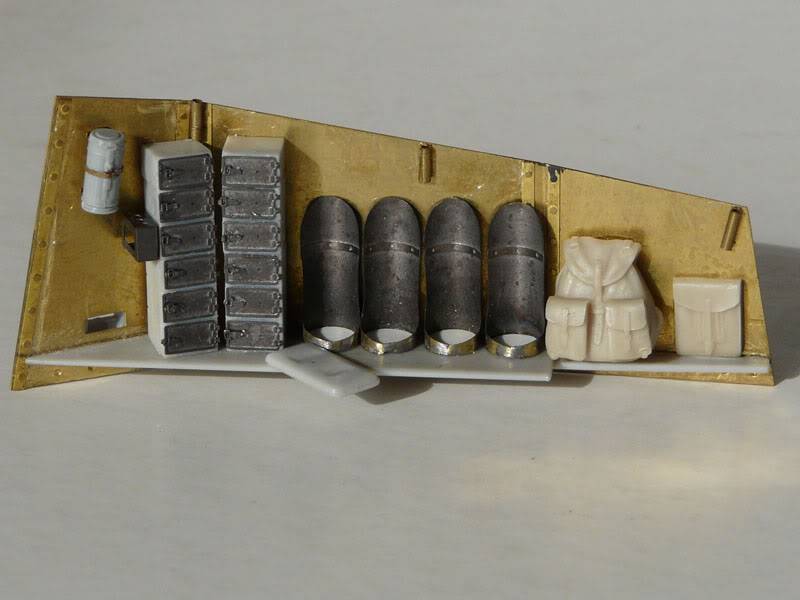
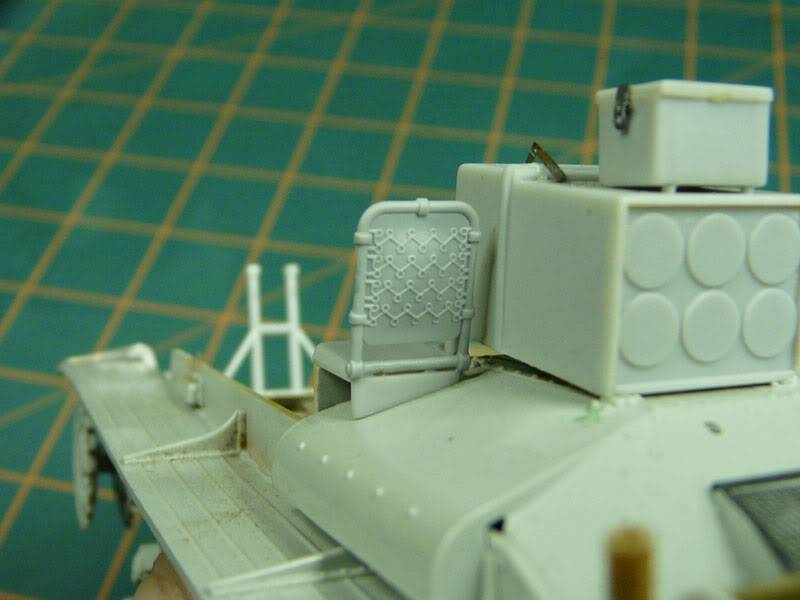
As with all PE kits there are many tiny parts to deal with, this is the tarp tie downs that go around the upper part of the shields.

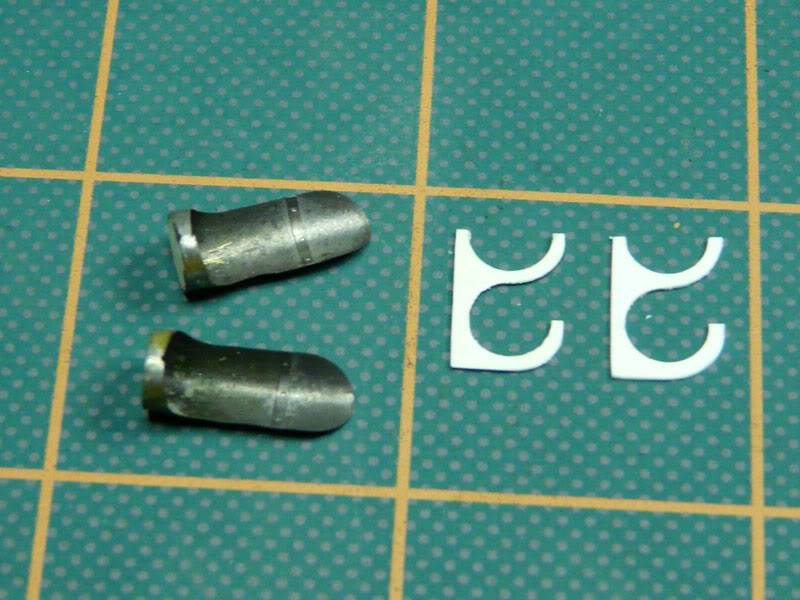
The ammo holders that go on the shield needed a bracket to be secured on the side, the PE kit does not supply one so I used a piece of styrene to make one…..
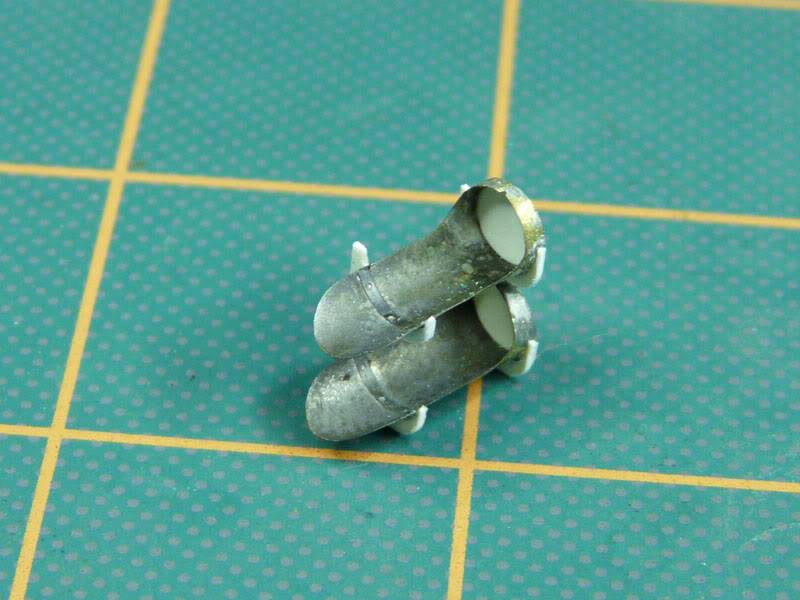
It looks like this after glued together ….
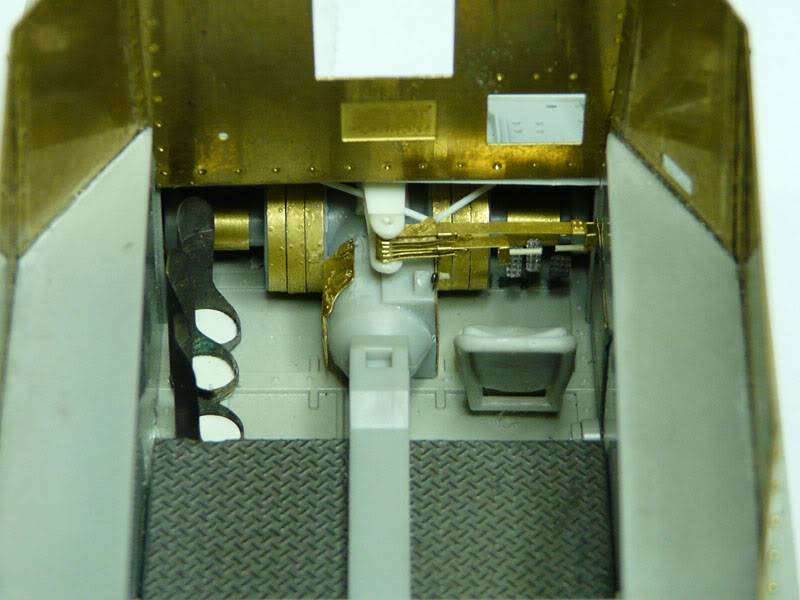
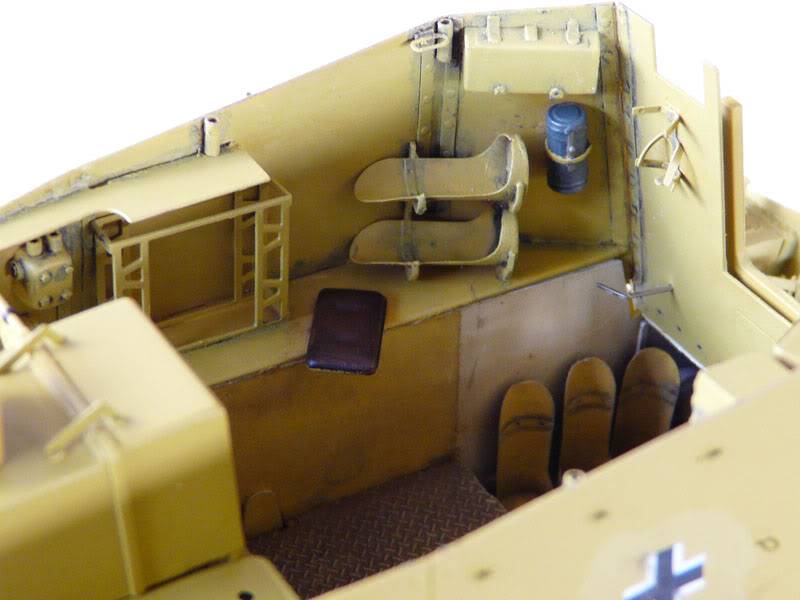
Next came the transmission details, for this I used the Griffon Model set, it is made for the more recent dragon kits witch have a more detailed transmission, the one that comes with the old Grille kit is very crude and with almost no detail, so I only used the steering levels and a few detail parts that can be seen from the fighting compartment, the front and sides shields are just dry fitted for the photo……

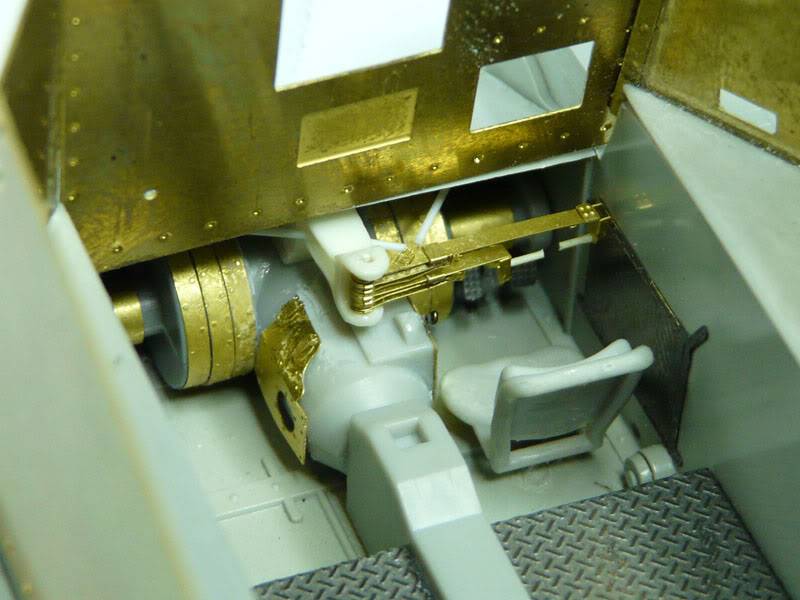
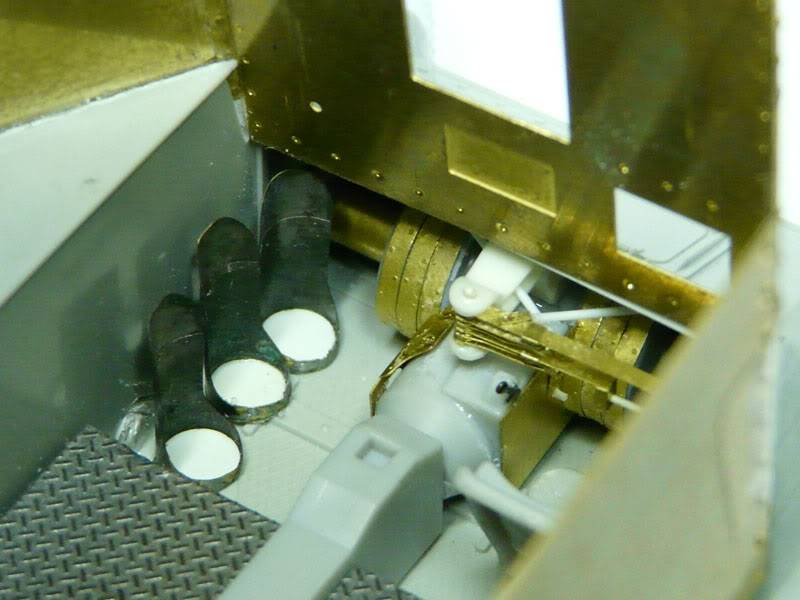
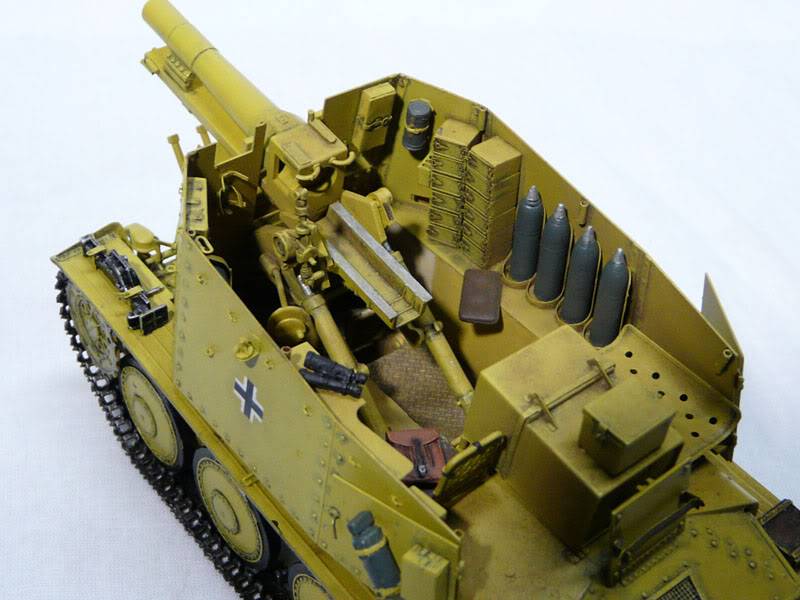
Here are the side shields with all its parts installed, the kit has many missing details inside, I only added a few basic ones cause it will take forever to do all what it needs
And don’t want to do a super detail work on this one...

With all the interior parts installed its time to start painting the interior , so that’s coming next….thanks for watching…
The ends of the ammo holders, I added a styrene disk on the bottom as this are not supplied in the PE kit and I think it needs one.
So I took my trusty home made punch and made all the needed disks
And this is how it looks like completed
Next I continued adding small details to different parts of the vehicle and ammo bins gun base etc…
As with all PE kits there are many tiny parts to deal with, this is the tarp tie downs that go around the upper part of the shields.
The ammo holders that go on the shield needed a bracket to be secured on the side, the PE kit does not supply one so I used a piece of styrene to make one…..
It looks like this after glued together ….
Next came the transmission details, for this I used the Griffon Model set, it is made for the more recent dragon kits witch have a more detailed transmission, the one that comes with the old Grille kit is very crude and with almost no detail, so I only used the steering levels and a few detail parts that can be seen from the fighting compartment, the front and sides shields are just dry fitted for the photo……
Here are the side shields with all its parts installed, the kit has many missing details inside, I only added a few basic ones cause it will take forever to do all what it needs
And don’t want to do a super detail work on this one...
With all the interior parts installed its time to start painting the interior

fledermaus- seasoned veteran

- Posts : 194
Join date : 2008-11-24
Age : 58 Location : Paradise Island, Puerto Rico

brokeneagle- seasoned veteran
- Posts : 406
Join date : 2009-03-23
Age : 60 Location : Melbourne (Vic) Australia, Up the road from Peter who is around the corner from Matt.
Re: Abdin's build: Dragon Grille 138/1 H FINISHED 10/31/2009
![]() Jenny Ryan Tue Jul 21, 2009 6:36 am
Jenny Ryan Tue Jul 21, 2009 6:36 am
Well this is marvelous , I love all the detail work you have done !
Jenny
Jenny

Jenny Ryan- Supreme commander

- Posts : 6599
Join date : 2008-11-17 Location : NSW Australia -

Re: Abdin's build: Dragon Grille 138/1 H FINISHED 10/31/2009
![]() Noel-Petroni Tue Jul 21, 2009 7:39 am
Noel-Petroni Tue Jul 21, 2009 7:39 am
Wow! You're turning this kit into a super model!
The detail you are doing is fantastic!
Regards
Noel
The detail you are doing is fantastic!
Regards
Noel

Noel-Petroni- General

- Posts : 1665
Join date : 2008-11-19
Age : 62 Location : Malta
Re: Abdin's build: Dragon Grille 138/1 H FINISHED 10/31/2009
![]() lupanzer Tue Jul 21, 2009 4:22 pm
lupanzer Tue Jul 21, 2009 4:22 pm
Dear Abdin.
...great details on this one...my congraulations...folowing with a big interest!
Regards!
Luiz.
...great details on this one...my congraulations...folowing with a big interest!
Regards!
Luiz.

lupanzer- Tank Commander

- Posts : 515
Join date : 2008-11-17 Location : Rio de Janeiro-Brazil
Re: Abdin's build: Dragon Grille 138/1 H FINISHED 10/31/2009
![]() Kreighshoer Tue Jul 21, 2009 4:31 pm
Kreighshoer Tue Jul 21, 2009 4:31 pm
the cygnet that turned into a swan ... no wait ... ... every cygnet turns into a swan ... duck ... the ugly dug turned into a swan ... better ... phantabulous work! a real thriller to watch ... no ... a hitchcock ... yes ... this is a hitchcock! blockbuster entertainment! kudos abdin! (hot weather + cold beer = laura tipsy! ... sorry!)

Kreighshoer- Platoon Commander

- Posts : 2962
Join date : 2008-11-19
Age : 53
Re: Abdin's build: Dragon Grille 138/1 H FINISHED 10/31/2009
![]() Bob Letterman Tue Jul 21, 2009 8:32 pm
Bob Letterman Tue Jul 21, 2009 8:32 pm
Hi Abdin,
Absolutely fantastic job you are doing on that not-so-good kit! Very clean build and the detail work is extraordinary!
Congratulations!
Bob
Absolutely fantastic job you are doing on that not-so-good kit! Very clean build and the detail work is extraordinary!
Congratulations!
Bob
Bob Letterman- Platoon Commander
- Posts : 1583
Join date : 2008-12-13
Age : 82 Location : Troy, Missouri USA -
Re: Abdin's build: Dragon Grille 138/1 H FINISHED 10/31/2009
![]() Dragunov Tue Jul 21, 2009 9:21 pm
Dragunov Tue Jul 21, 2009 9:21 pm
Hi Abdin,
Somehow I've missed this post! What an impressive peace of work, impressive! Love you're eye for detail!
Cheers Erik
Somehow I've missed this post! What an impressive peace of work, impressive! Love you're eye for detail!
Cheers Erik

Dragunov- General
- Posts : 936
Join date : 2009-02-28
Age : 55 Location : Netherlands
Re: Abdin's build: Dragon Grille 138/1 H FINISHED 10/31/2009
![]() fledermaus Thu Oct 22, 2009 7:51 pm
fledermaus Thu Oct 22, 2009 7:51 pm
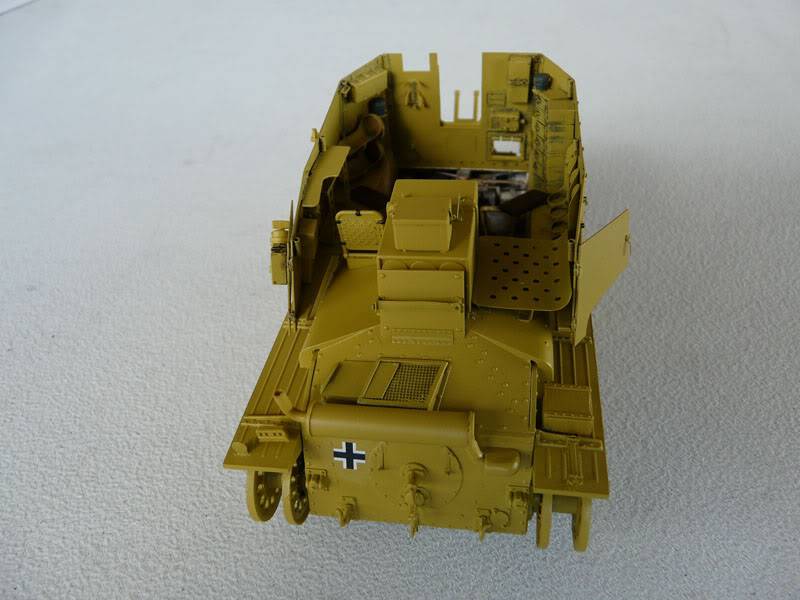
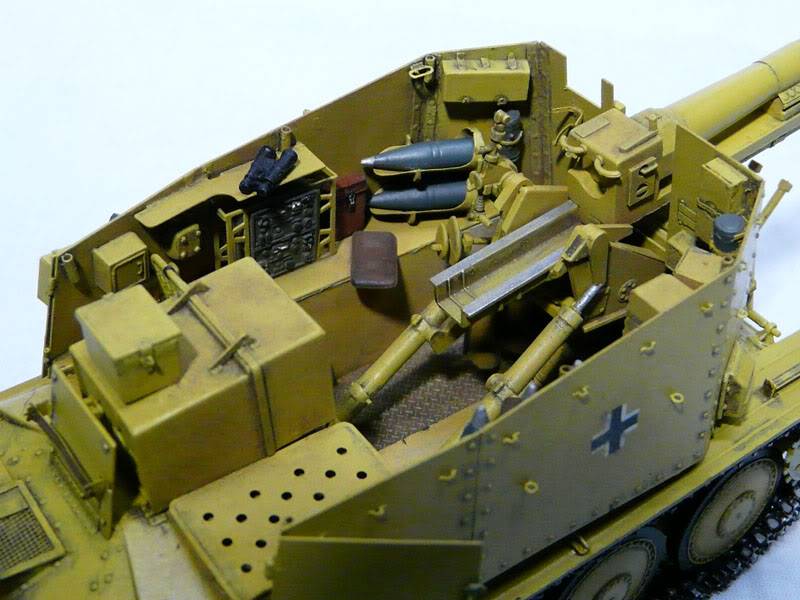
Hi my friends!! Thank you all for your comments , Time for an update, I’m in the final stage of the grille build, hope to finish on time, so this is where I’m now……..
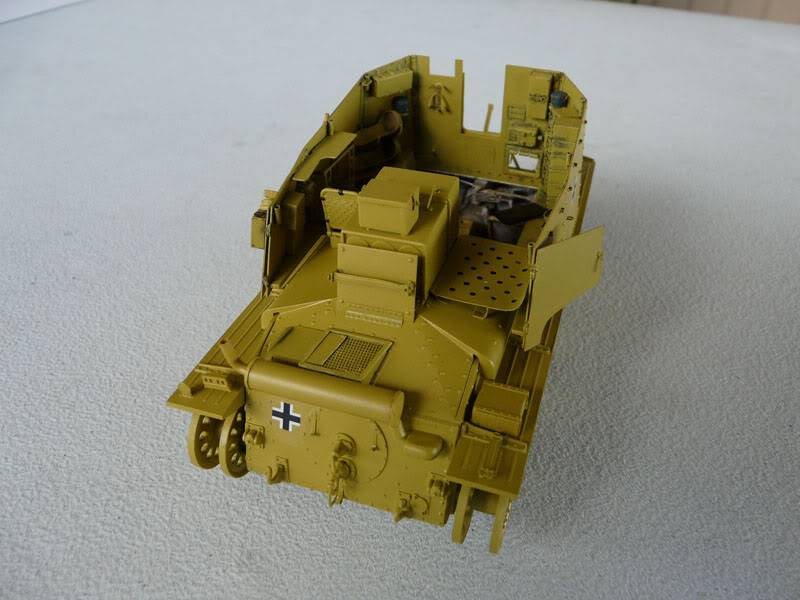
Painted the interior and weathered it using dry brushing and powders…
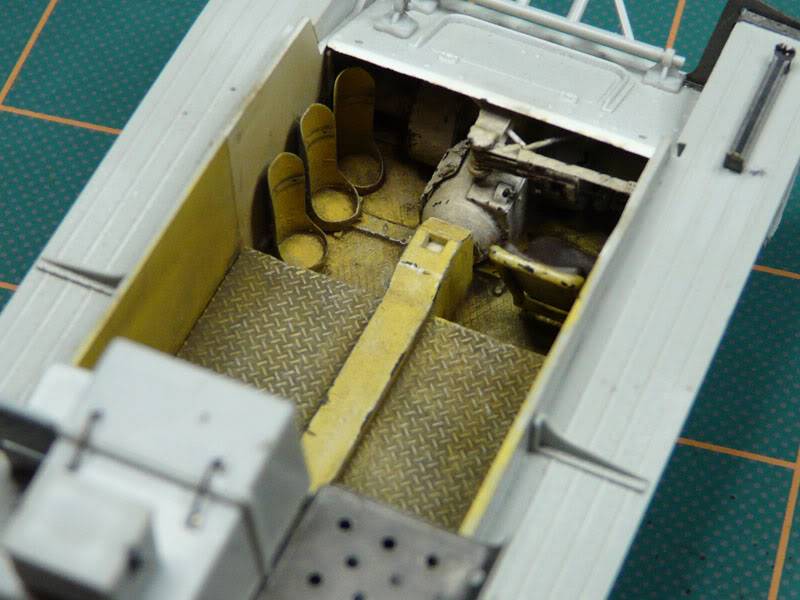
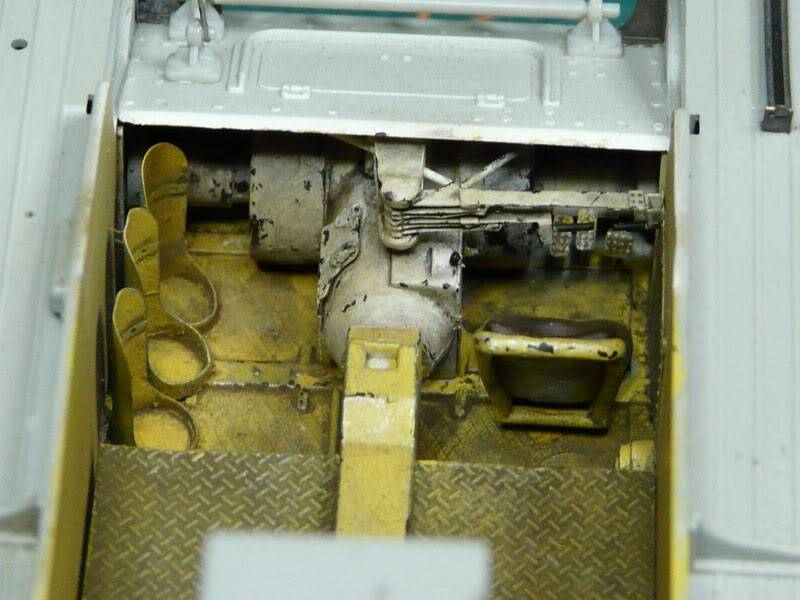
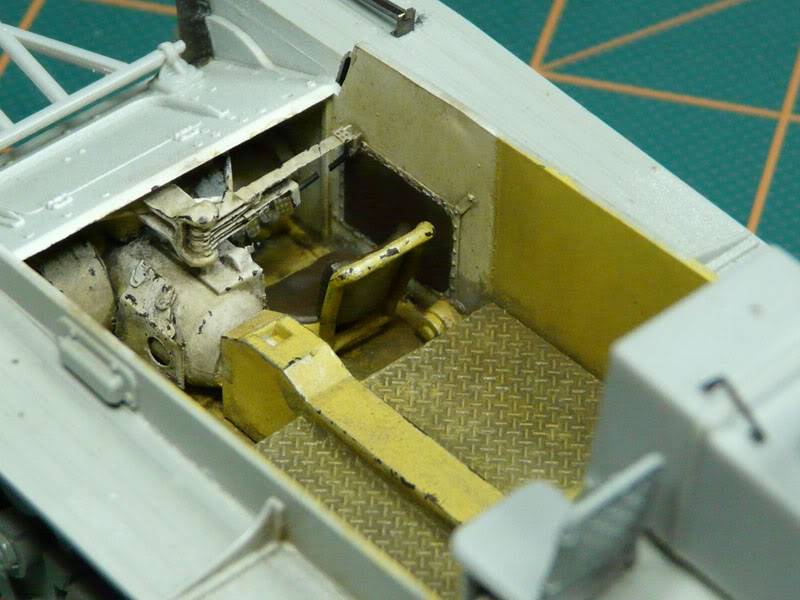

Next installed the seat on top of the engine compartment, I changed the back rest with one from dragons drilling kit as it was better detailed than the original one……
The muffler was completely redone as the one from the kit was a junk, so using brass tube and styrene disks I did a new one, the pipe is a piece of sprue drilled out
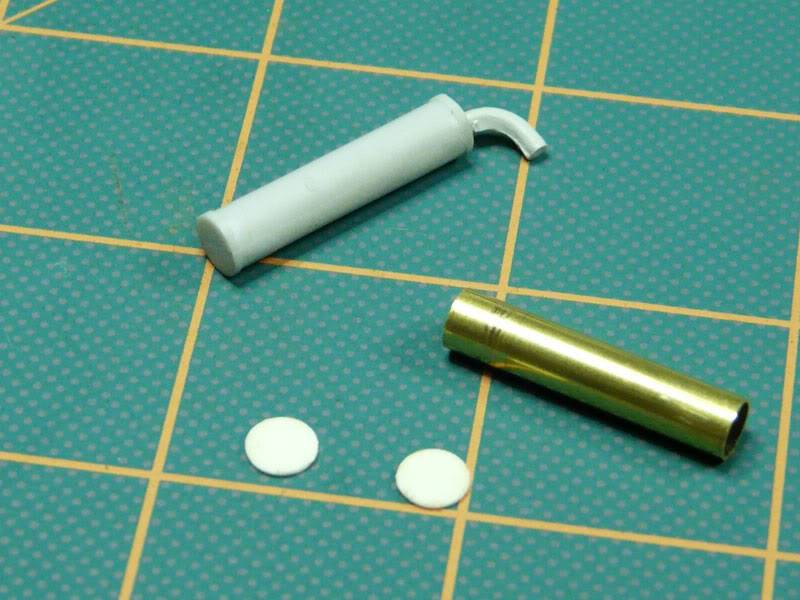
The original and the new muffler
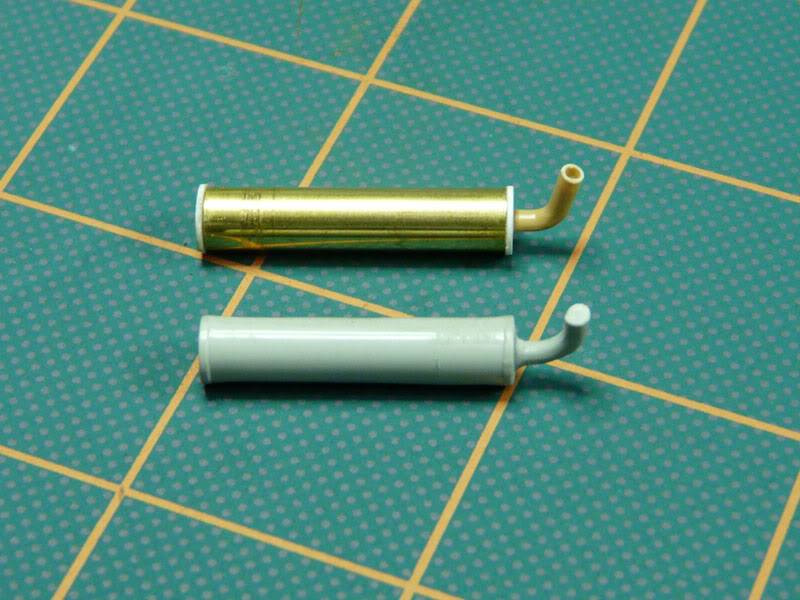
This is how it looks installed…….
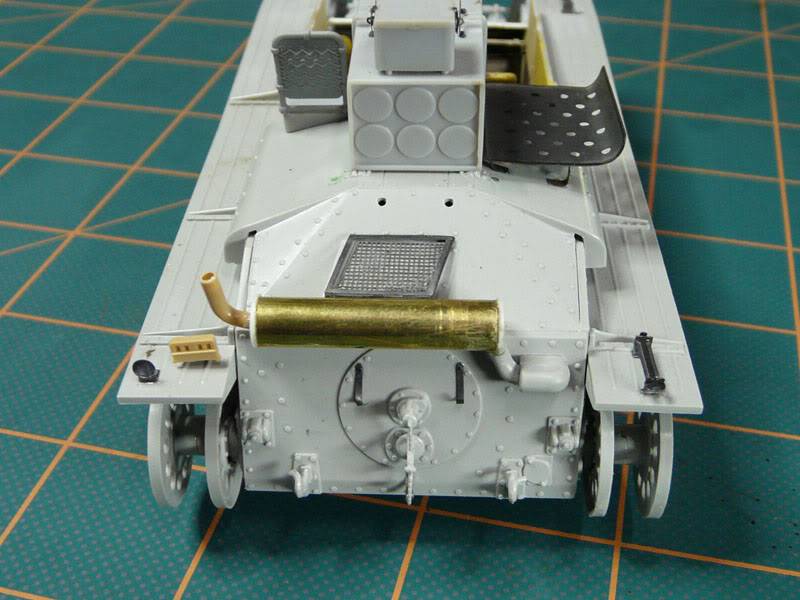
Finally the model received the first coat of paint and some decals from archer…..
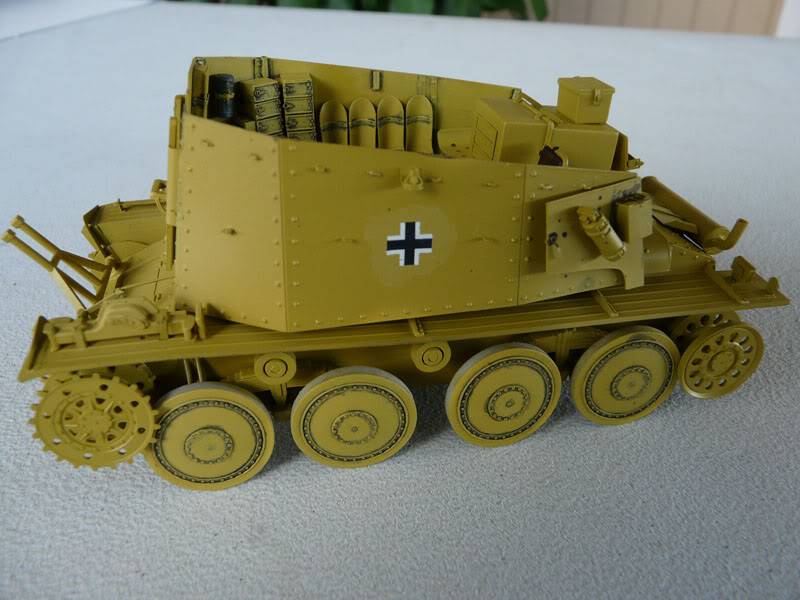

Next step will be to finish some more weathering on the interior top and start the white wash finish on the exterior……
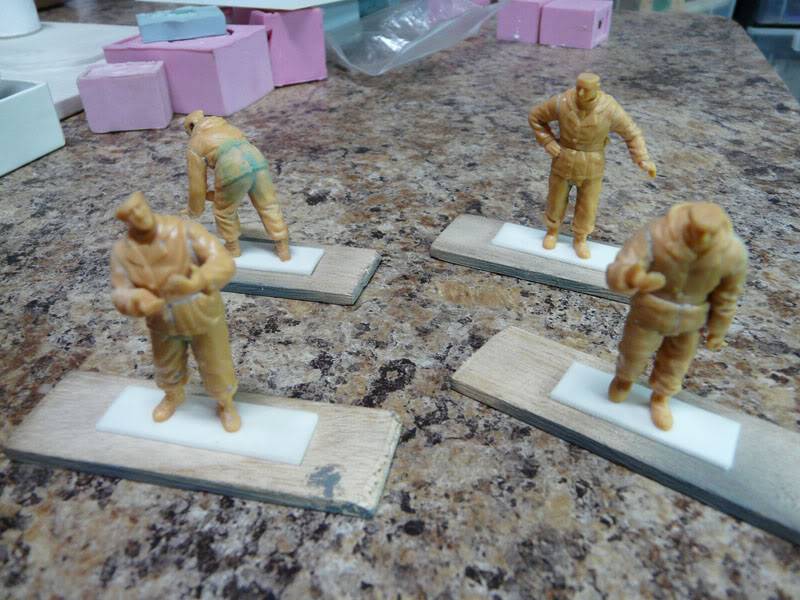
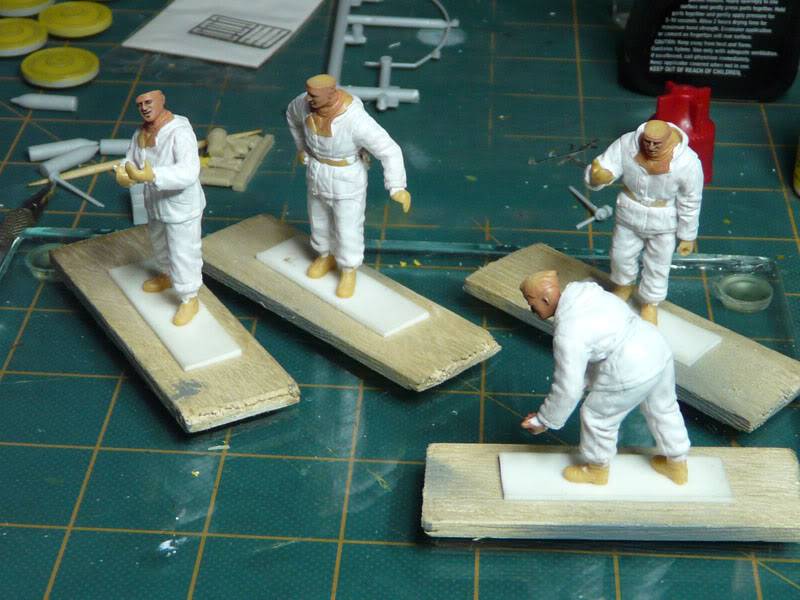
Here are the kits figures, some filling and it received the first coats of paint…..
I hope to finish on time so I have to step on it, the base is already done, pictures coming next with last update, thanks for watching and hope you like it……. 
Painted the interior and weathered it using dry brushing and powders…
Next installed the seat on top of the engine compartment, I changed the back rest with one from dragons drilling kit as it was better detailed than the original one……
The muffler was completely redone as the one from the kit was a junk, so using brass tube and styrene disks I did a new one, the pipe is a piece of sprue drilled out
The original and the new muffler
This is how it looks installed…….
Finally the model received the first coat of paint and some decals from archer…..
Next step will be to finish some more weathering on the interior top and start the white wash finish on the exterior……
Here are the kits figures, some filling and it received the first coats of paint…..
I hope to finish on time so I have to step on it, the base is already done, pictures coming next with last update, thanks for watching and hope you like it…….
fledermaus- seasoned veteran
- Posts : 194
Join date : 2008-11-24
Age : 58 Location : Paradise Island, Puerto Rico
Re: Abdin's build: Dragon Grille 138/1 H FINISHED 10/31/2009
![]() G Cooper Fri Oct 23, 2009 3:44 am
G Cooper Fri Oct 23, 2009 3:44 am
That is looking fantastic. And those figures are looking real nice too. But seeing yours reminds me that I gotta do some work on my little Pz 38 hull kit.
Gary
Gary

G Cooper- naughty corner commissar

- Posts : 3027
Join date : 2009-01-16
Age : 112 Location : Yuma, Az.
Re: Abdin's build: Dragon Grille 138/1 H FINISHED 10/31/2009
![]() Jenny Ryan Fri Oct 23, 2009 4:12 am
Jenny Ryan Fri Oct 23, 2009 4:12 am
Looking Mighty fine Abdin but the clock is ticking . I really hope you get this one finished as it looks Kewl .
Jenny
Jenny
Jenny Ryan- Supreme commander
- Posts : 6599
Join date : 2008-11-17 Location : NSW Australia -
Re: Abdin's build: Dragon Grille 138/1 H FINISHED 10/31/2009
![]() brokeneagle Sun Oct 25, 2009 5:24 am
brokeneagle Sun Oct 25, 2009 5:24 am
excellent build and the figures are looking great. Good to see that Dragon are paying more attention to the seat details.
Ian.
Ian.
brokeneagle- seasoned veteran
- Posts : 406
Join date : 2009-03-23
Age : 60 Location : Melbourne (Vic) Australia, Up the road from Peter who is around the corner from Matt.
Re: Abdin's build: Dragon Grille 138/1 H FINISHED 10/31/2009
![]() Noel-Petroni Sun Oct 25, 2009 6:08 pm
Noel-Petroni Sun Oct 25, 2009 6:08 pm
I've been away for a while.... and just visited your post.
Good progress, Abdin! I like how the interior is coming along.
Regards
Noel
Good progress, Abdin! I like how the interior is coming along.
Regards
Noel
Noel-Petroni- General
- Posts : 1665
Join date : 2008-11-19
Age : 62 Location : Malta
Re: Abdin's build: Dragon Grille 138/1 H FINISHED 10/31/2009
![]() fledermaus Sat Oct 31, 2009 9:02 pm
fledermaus Sat Oct 31, 2009 9:02 pm
Hi my friends, finally I finished what seemed to be an eternal task  . I spent the last 4 nights working till 12:00 am to finish the diorama but thanks to god I was able to do it!!.
So let’s go…
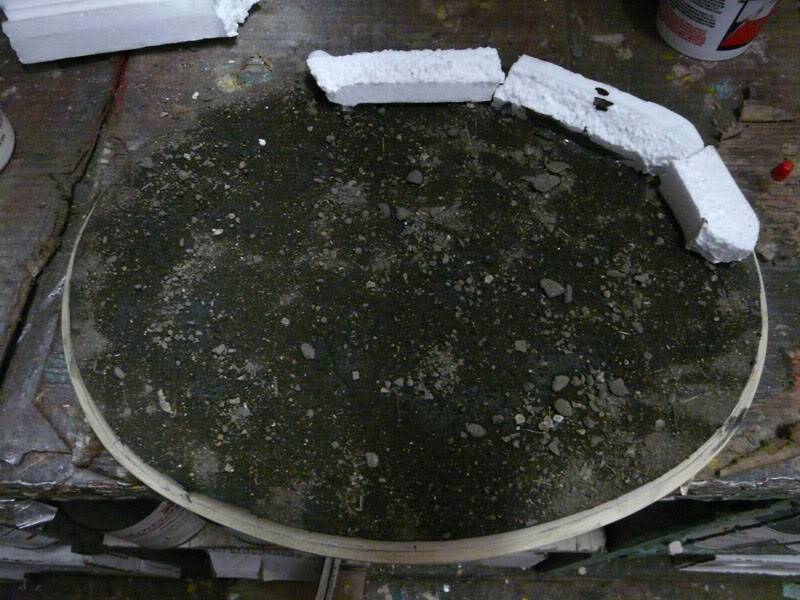
The base received some dirt from the back yard and was painted with brown colors, using foam I did the desired shape to the edge. then using spakling compound I shaped the hole area and looks like this
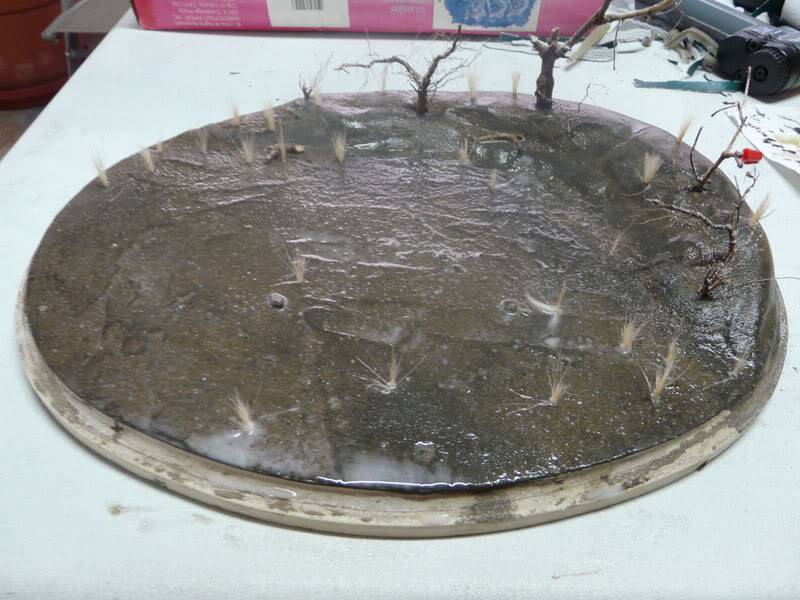
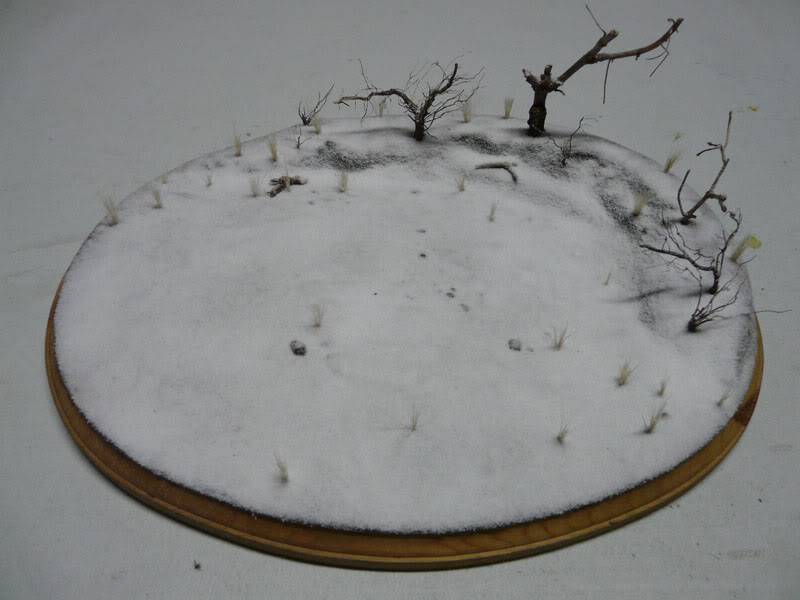
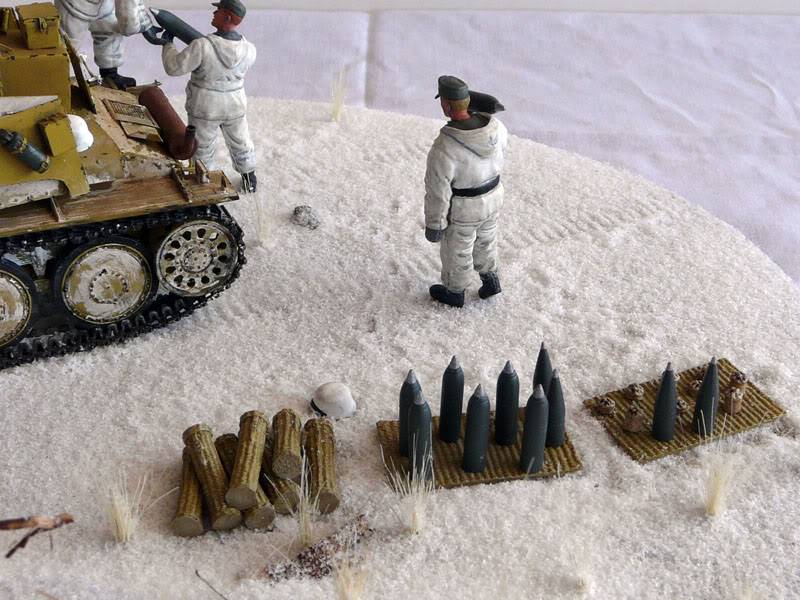
Using branches from the backyard I simulated the trees, the base is covered with diluted white glue and the woodland snow was added. Also added some tall grass here and there
Finally I sprayed the whole base with hair spray to seal the snow so it won’t blow off..
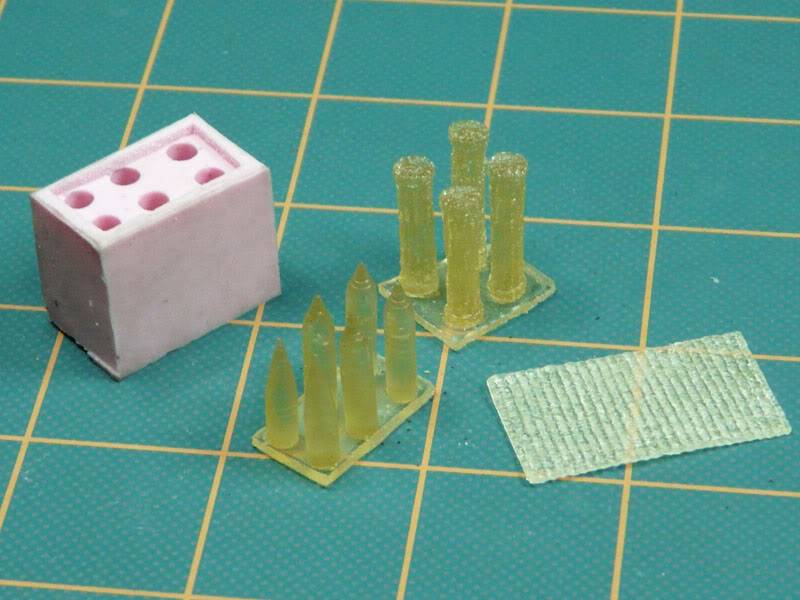
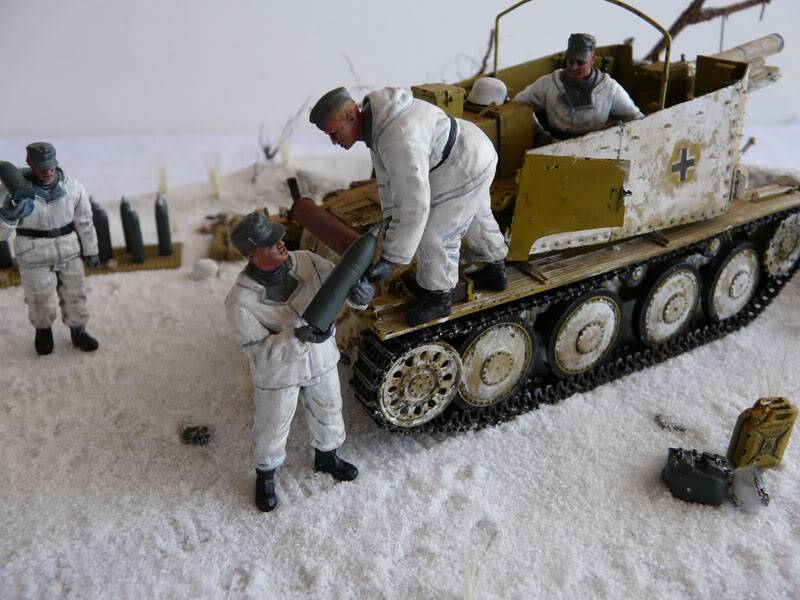
I did a mold of the ammo cases and mats from the dragon sfh18 set, also a mold for the extra shells needed.
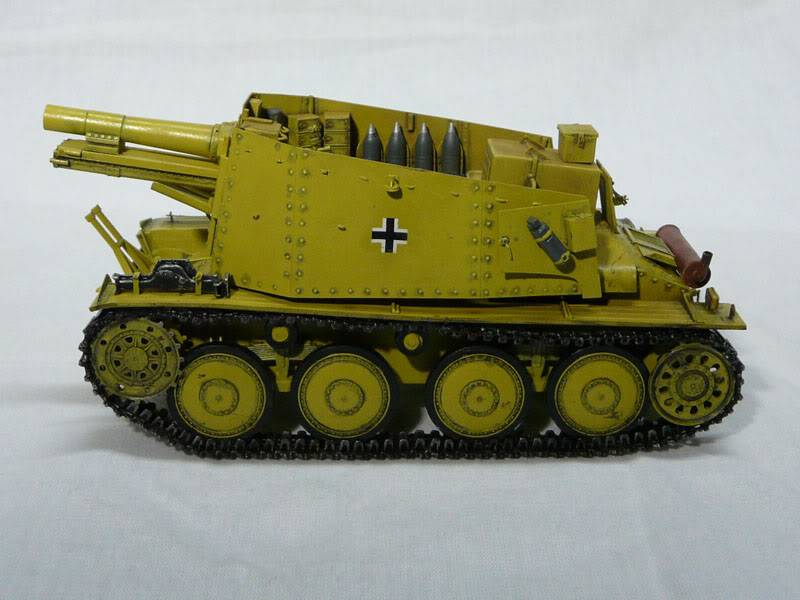
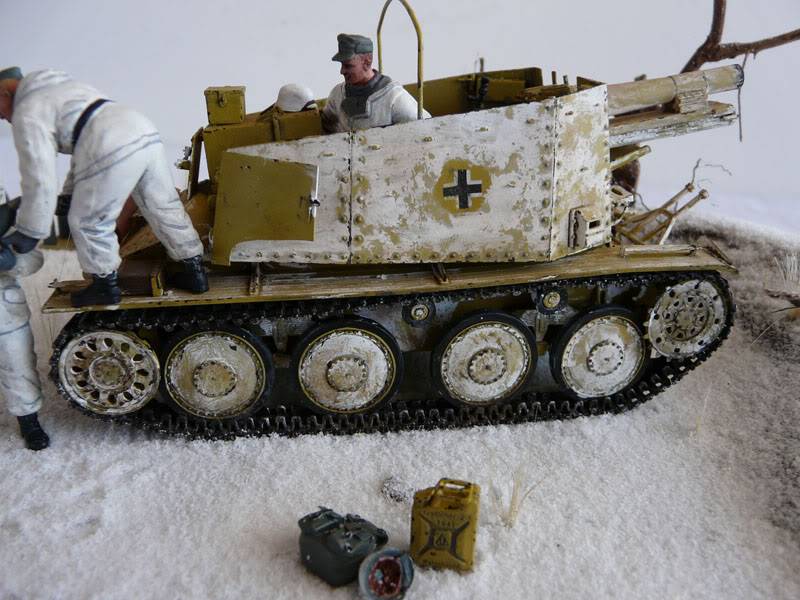
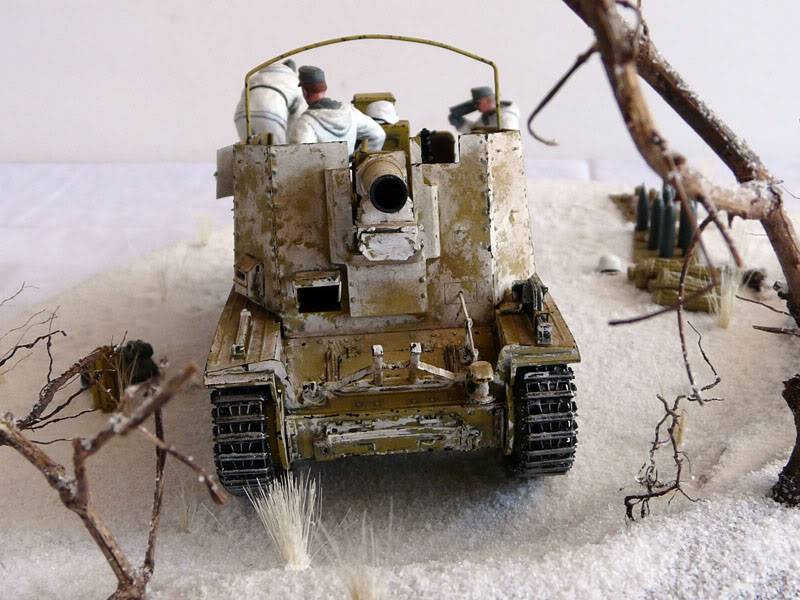
Here is the grille just before applying the white wash……..
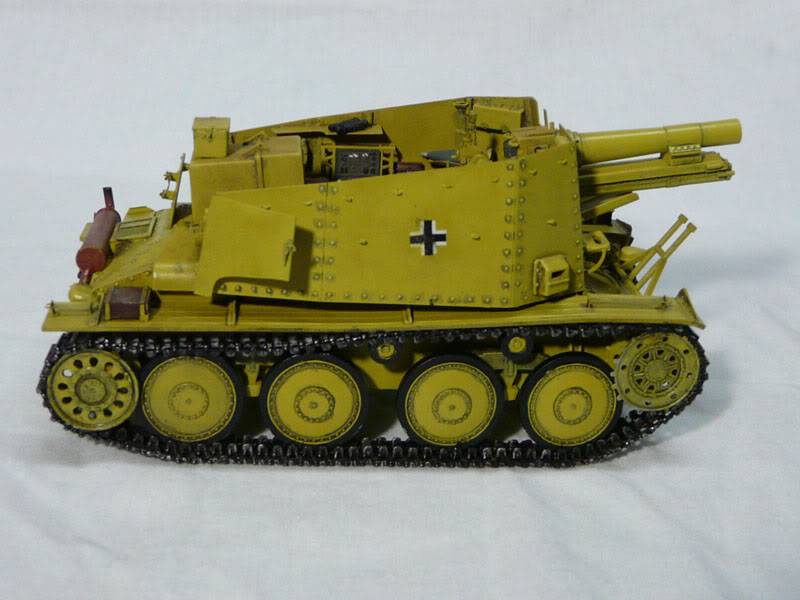
And now the white the wash, I first sprayed the model with hair spray, then I applied the white acrylic paint to the outside….
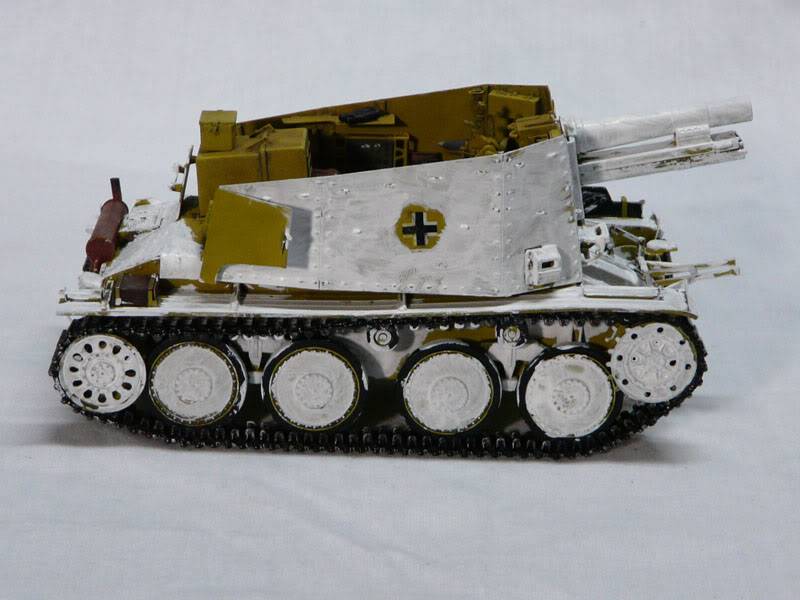
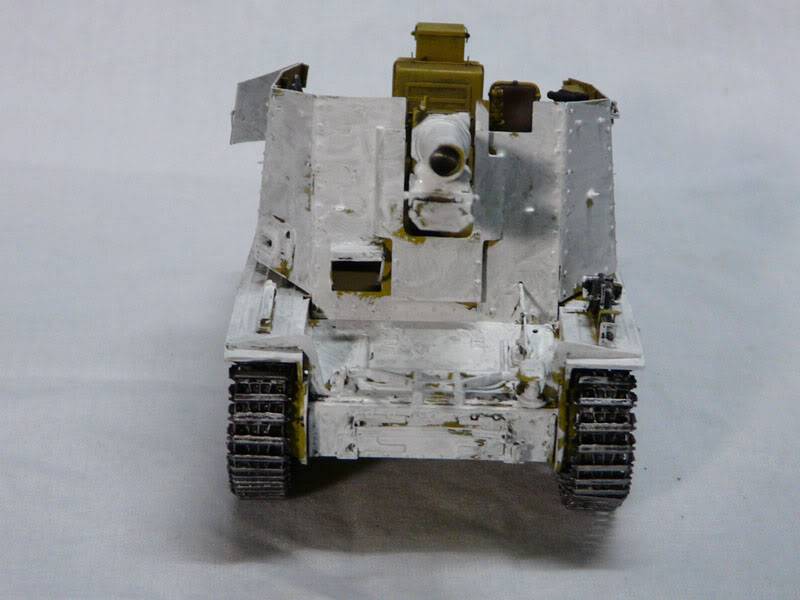
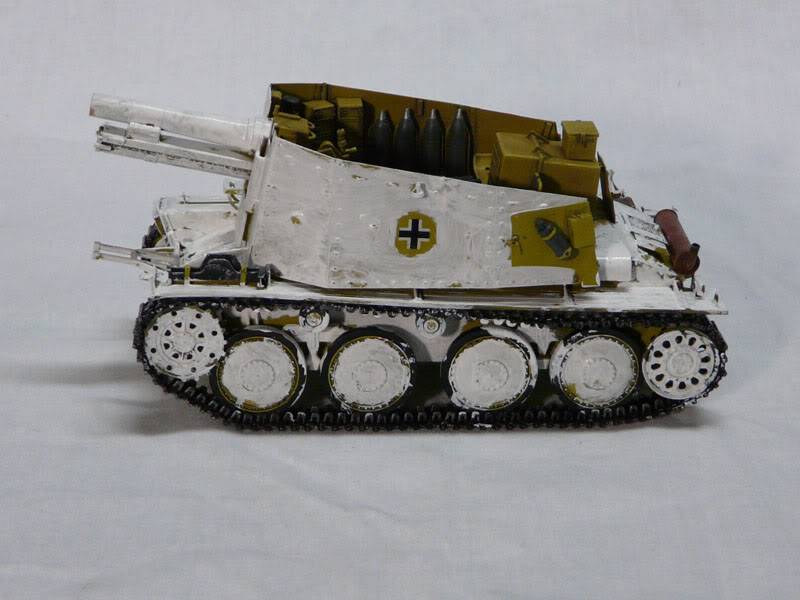

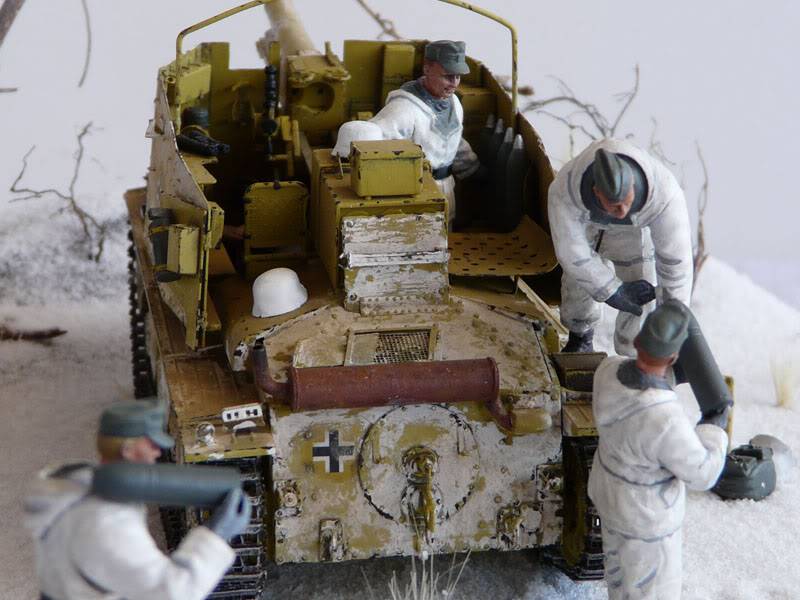
About 1 hour later I started to scrub the white paint with a stiff brush and water till it looked right, after that I dusted the white with weathering powders and here is the complete result……
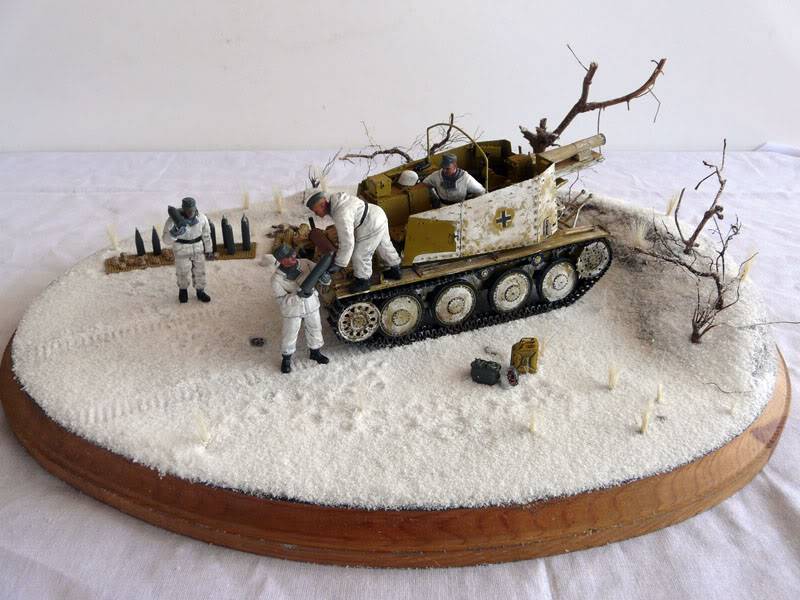


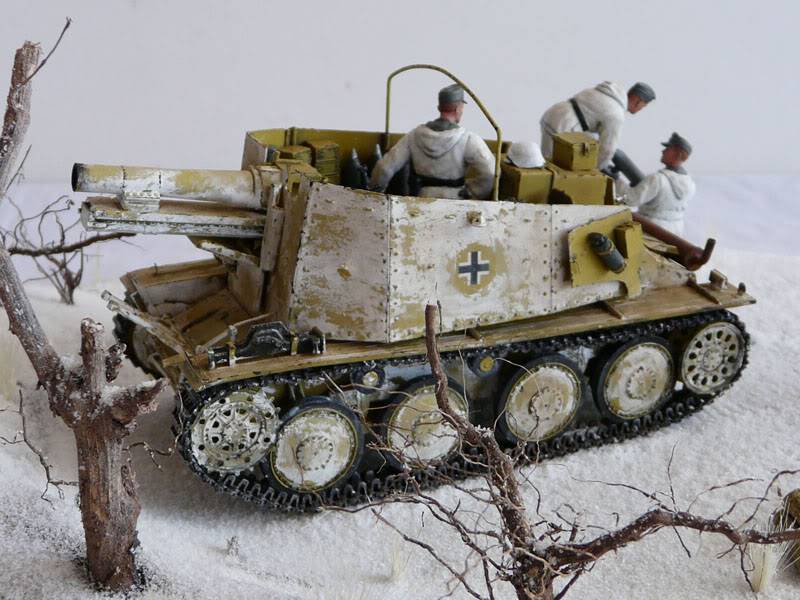
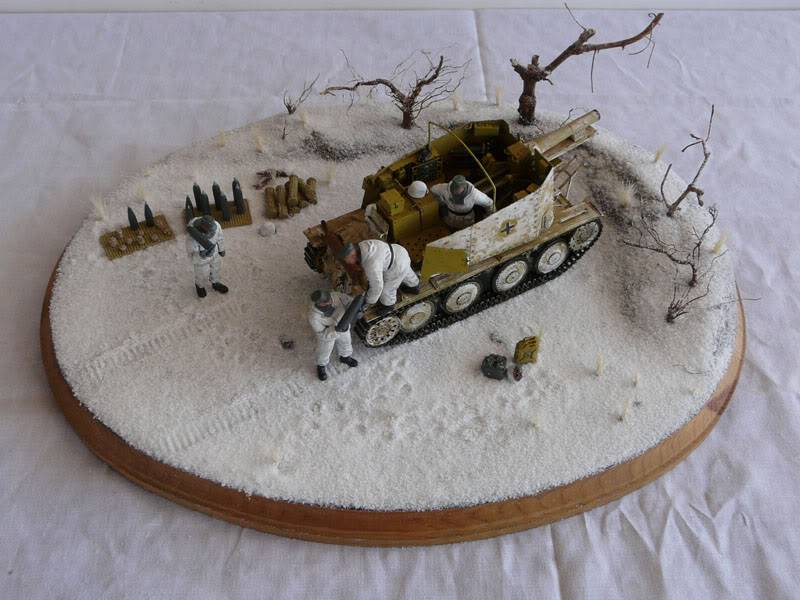
So I can declare this diorama finished, thanks to all of you that followed and supported me along………..
Abdin
. I spent the last 4 nights working till 12:00 am to finish the diorama but thanks to god I was able to do it!!. So let’s go…
The base received some dirt from the back yard and was painted with brown colors, using foam I did the desired shape to the edge. then using spakling compound I shaped the hole area and looks like this
Using branches from the backyard I simulated the trees, the base is covered with diluted white glue and the woodland snow was added. Also added some tall grass here and there
Finally I sprayed the whole base with hair spray to seal the snow so it won’t blow off..
I did a mold of the ammo cases and mats from the dragon sfh18 set, also a mold for the extra shells needed.
Here is the grille just before applying the white wash……..
And now the white the wash, I first sprayed the model with hair spray, then I applied the white acrylic paint to the outside….
About 1 hour later I started to scrub the white paint with a stiff brush and water till it looked right, after that I dusted the white with weathering powders and here is the complete result……
So I can declare this diorama finished, thanks to all of you that followed and supported me along………..
Abdin
fledermaus- seasoned veteran
- Posts : 194
Join date : 2008-11-24
Age : 58 Location : Paradise Island, Puerto Rico
Re: Abdin's build: Dragon Grille 138/1 H FINISHED 10/31/2009
![]() Guest Sat Oct 31, 2009 10:45 pm
Guest Sat Oct 31, 2009 10:45 pm
Very nice job in the details!!!
Guest- Guest
Re: Abdin's build: Dragon Grille 138/1 H FINISHED 10/31/2009
![]() StuG Sun Nov 01, 2009 1:28 am
StuG Sun Nov 01, 2009 1:28 am
Good one Abdin...Congrats..

StuG- seasoned veteran
- Posts : 131
Join date : 2009-08-30 Location : Istanbul-Turkey -
Re: Abdin's build: Dragon Grille 138/1 H FINISHED 10/31/2009
![]() Noel-Petroni Mon Nov 02, 2009 8:40 pm
Noel-Petroni Mon Nov 02, 2009 8:40 pm
Nice diorama, Abdin!
I like the foot prints in the snow. THe white wash came out nice too!
Congrats
Noel
I like the foot prints in the snow. THe white wash came out nice too!
Congrats
Noel
Noel-Petroni- General
- Posts : 1665
Join date : 2008-11-19
Age : 62 Location : Malta
Re: Abdin's build: Dragon Grille 138/1 H FINISHED 10/31/2009
![]() fledermaus Mon Nov 16, 2009 1:33 pm
fledermaus Mon Nov 16, 2009 1:33 pm
Johnny, stug and noel, thanks for your comments, glad you liked it.
Abdin
Abdin
fledermaus- seasoned veteran
- Posts : 194
Join date : 2008-11-24
Age : 58 Location : Paradise Island, Puerto Rico
Page 2 of 2 • 1, 2
» Jennys Build : Dragon Marder II ALL FINISHED SEPTEMBER 6th !!!!!!
» Bob's build A Dragon Flakpanzer 38(t) September 14th, All Finished!!
» Richies Build : Tamiya 1/35 Hetzer FINISHED 3rd October
» Dragon Sdkfz 138/1 Geschutzwagen 38 H :-) ready ! 30-10-2009
» Ruben's Build; Bison I from Alan Models Finished 07/07/09
» Bob's build A Dragon Flakpanzer 38(t) September 14th, All Finished!!
» Richies Build : Tamiya 1/35 Hetzer FINISHED 3rd October
» Dragon Sdkfz 138/1 Geschutzwagen 38 H :-) ready ! 30-10-2009
» Ruben's Build; Bison I from Alan Models Finished 07/07/09
Page 2 of 2
Permissions in this forum:
You cannot reply to topics in this forum|
|
|